








Fifty years ago, Tamiya put a motor, rubber tires, working suspension and a rear differential under a Porsche 934 body and called it their first R/C car. Collectors now chase those original kits at auction prices that make a grown man reconsider his retirement plan. The good news: you don't need a time machine or a second mortgage. Tamiya's 1/10 Porsche 934 (1976) 50th Anniversary kit brings the car back with a modern rear-motor chassis, TRF dampers and a serial-numbered stainless plate.
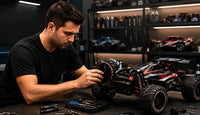
This is a kit, though, which means a box of bags, a manual, a clear body and a list of things "sold separately." Here's how we'd approach the build at the Tinker Tom bench: what to buy before you open the box, how to get through the chassis without stripped screws or a gritty diff, and how to paint that famous cobalt green so it looks like a race car and not a lime popsicle.
The Short Answer
The Tamiya 47524 Porsche 934 is a beginner-friendly but detail-heavy kit: plan on two or three evenings for the chassis, a separate weekend for paint, and budget for a 2-channel radio, steering servo, ESC, Type 540 motor, 7.2–7.4V battery, charger and Tamiya polycarbonate paint.
- Chassis: RR (rear-motor) layout, front double wishbones, rear trailing arms, oil-filled 4-pinion diff, 7.95:1 stock gear ratio.
- Body: clear polycarbonate. Tamiya-focused references list PS-54 Cobalt Green for the body; paint it from the inside.
- Magnetized, hole-less body mounts let you keep the shell pristine for the display shelf.
- Go slow on screws into plastic, build the diff and dampers carefully, and let paint cure 24 hours before trimming.
1. Before You Open the Box: What the Kit Includes and What It Doesn't
Tamiya lists the 934 as a 1/10 rear-wheel-drive car on an RR chassis with a rear-longitudinal motor: 435 mm long, 202 mm wide, 130 mm tall, with a 230 mm wheelbase (or 251 mm). You get a lot in the box, but it is not a runner until you add electronics. Here's the full picture, pulled from Tamiya's product page and the TamiyaClub kit listing.
| Item | Included? | Notes |
|---|---|---|
| Polycarbonate body, wing, mirrors, light cases | Yes | Clear, unpainted. Two sticker sheets plus window masks included. |
| TRF dampers, stabilizers, oil-filled diff | Yes | Build these slowly; they decide how the car feels. |
| Wheels and tires | Yes | 2-piece mesh wheels with plated rims; 24 mm wide, 64 mm diameter radials. |
| Driver/cockpit set and numbered plate | Yes | Stainless steel, serial-numbered limited edition plate. |
| 2-channel radio and receiver | No | A 2.4 GHz surface radio with receiver. |
| Steering servo | No | Check the manual for the servo size it expects. |
| ESC and Type 540 motor | No | Match the ESC to the motor you pick. |
| 7.2–7.4V battery and charger | No | Check the battery fits the tray before you buy. |
| Polycarbonate paint | No | Tamiya PS series for the body; reference sources list PS-54 Cobalt Green. |
| Tools | No | Phillips drivers, side cutters, hobby knife, body scissors, reamer, needle-nose pliers. |
Pick your electronics before build night
Tamiya calls for a 2-channel R/C system with ESC, plus a Type 540 motor sold separately. The servo, ESC and receiver all mount during chassis assembly, so have them on the bench when you start. A pistol-grip radio like the Spektrum DX3 covers the transmitter and receiver; browse motors and ESCs for the rest.
Battery and gearing
Plan on a 7.2–7.4V pack with a matching charger. Stock gearing is 7.95:1, and Tamiya says nine ratios from 7.95:1 to 6.54:1 are possible with separately sold pinions. Leave it stock for the first runs. If you change pinions later, re-check gear mesh: our gear mesh guide shows the paper trick.
Collector or runner? Decide now
The kit ships with magnetized body mounts so you never have to drill the body. If this car will mostly live on a shelf next to its serial-numbered plate, use them. If it will run, you may still prefer them for a clean look; just keep it on smooth pavement.
2. Building the Chassis: Diff, Dampers and Steering Without Drama
Tamiya's manual walks you through the build step by step, which doesn't stop people from rushing. The chassis has three jobs that reward patience: the differential, the dampers and the steering linkage.
Sort, then build one bag at a time
Open only the bag the manual calls for. Use a muffin tin or magnetic tray for screws, and check each screw's length against the manual's drawing before you drive it. Self-tapping screws cut their own threads in plastic. Turn them until snug and stop. One extra quarter-turn strips the hole, and plastic holes don't come back.
The oil-filled 4-pinion diff
The 934 uses an oil-filled 4-pinion gear differential. Fill to the level the manual shows, let bubbles rise out before sealing, and make sure the gasket or O-ring is seated so the case doesn't weep. A diff that feels gritty or notchy when you turn the outdrives by hand gets opened up now, not after the first run.
Black TRF dampers and stabilizers
The kit includes black TRF dampers and stabilizers. Build the shocks so left and right match: same oil, same piston, same length. Our shock rebuild guide covers bleeding them without air bubbles. Mismatched shocks are an easy way to make a car push or spin for no obvious reason.
Steering, servo and threadlock
Tamiya specifies ball bearings in the steering linkage. Center the servo with the radio on before you attach the horn, then set the turnbuckles so the front wheels point straight. Use a drop of medium threadlocker only on screws that thread into metal, never on screws going into plastic. That's a bench rule we don't bend.

3. Painting the 1976 Cobalt Green Body
The original 934 in this livery wore a cobalt green scheme with Kremer Racing's rabbit mascot, and Tamiya's sticker sheets supply the markings. The paint is on you. Tamiya-focused references list PS-54 Cobalt Green for the body (Tamiya describes it as a green with a blue tinge, made for polycarbonate R/C bodies), with TS-102 Cobalt Green for the hard-plastic wing and mirrors.
Use the right paint on the right part
The body is polycarbonate and gets painted from the inside with PS spray. The wing, mirrors and light cases are hard plastic and need hobby paint like TS. Tamiya is blunt about it on the PS-54 page: never use PS paint on plastic models.
Step-by-step paint procedure
- Wash the inside. Warm water, a few drops of dish soap, clean paper towels. Dry completely with a lint-free towel. Mold release and fingerprints are what make paint peel later.
- Mask the windows. Apply the kit's masking stickers inside the windows and light openings, then burnish the edges with the back of a thumbnail so paint can't creep under.
- Brush details first. Tamiya's own advice is to brush-paint small details with polycarbonate bottle paint before spraying the main color.
- Spray the color in light coats. Hold the can about 30 cm (12 in) from the body and build PS-54 in several thin passes instead of one wet coat. Let each coat set before the next.
- Back it. Mid and light colors look thin from outside unless you back them. A coat of PS-12 Silver or PS-1 White behind the green deepens it and blocks light.
- Wait 24 hours. Then peel the outer overspray film, trim the body and fit the wing, mirrors and decals.
Trim and mount like a pro
Use curved scissors for wheel arches and straight blades for long edges. Roll the edge gently against your thumb as you cut so it doesn't crack. If you are using pins instead of the magnets, ream holes small and enlarge them only as needed. For a chrome or metallic accent on another body, our mirror chrome guide goes deeper on backing and coats.

Conclusion
The 50th Anniversary 934 is a kit you build twice: once as an R/C car, with a careful diff, matched dampers and a centered servo, and once as a scale model, with a clean cobalt green body, sharp decals and that numbered plate. Take it a bag at a time, let the paint cure, and you'll end up with a car that drives well and looks right on the shelf.
Atlanta Hobby stocks the Tamiya Porsche 934 50th Anniversary kit, Tamiya polycarbonate paint, tools and surface radios. Stop by our Cumming, GA showroom with your kit and manual, and we'll help you pick the electronics and paint before you start cutting bags open.
Gear Mentioned in This Guide

Tamiya 1/10 RC Porsche 934 (1976) 50th Anniversary (TAM47524)
The limited 50th Anniversary kit: RR chassis, TRF dampers, oil-filled diff and a numbered plate.
Shop now
Tamiya PS-54 Cobalt Green Polycarbonate Spray (86054)
The blue-tinged green behind the 1976 Kremer livery. Sprayed inside the clear body.
Shop now
Tamiya PS-12 Silver Polycarbonate Spray (86012)
A backing coat that keeps the green from looking thin and see-through.
Shop now
Body Reamer, Scissors (Curved and Straight) Set
Curved blades for wheel arches, straight for edges, reamer for clean mount holes.
Shop now
Spektrum DX3 Smart 3-Channel Transmitter with SR315 Receiver
Covers the radio half of the 'sold separately' list. Add a servo, ESC and motor.
Shop now
Blue Threadlocker Brush-in-Cap Medium Strength 10g
Medium strength, for screws that thread into metal. Never on screws into plastic.
Shop nowFrequently Asked Questions
How hard is the Tamiya Porsche 934 50th Anniversary kit to build?
It's a good kit for a patient first-timer. Tamiya's manual is step-by-step and well illustrated. The tricky parts are filling the oil diff, building matched dampers and painting the body, not the assembly itself.
What do I need to buy to finish the Tamiya 47524?
A 2-channel radio and receiver, a steering servo, an ESC, a Type 540 motor, a 7.2–7.4V battery with a charger, Tamiya polycarbonate paint for the body, and basic hand tools.
What paint color is the Porsche 934 50th Anniversary body?
The livery is cobalt green. Tamiya-focused references list PS-54 Cobalt Green spray for the polycarbonate body and TS-102 Cobalt Green for the hard-plastic wing and mirrors.
Do I need to drill holes in the body?
No. Tamiya includes magnetized body mounts so you can fit the body without body-pin holes.
What is the stock gear ratio and can I change it?
Stock is 7.95:1. Tamiya says nine ratios between 7.95:1 and 6.54:1 are possible with separately sold pinions. Re-check gear mesh after any change.
Was the Porsche 934 really Tamiya's first R/C car?
Yes. Tamiya released its first R/C car, a 1/12-scale Porsche 934 Turbo, in November 1976. The 50th Anniversary kit celebrates that release.
Sources and Further Reading
- Tamiya: 1/10 R/C Porsche 934 (1976) 50th Anniversary, item 47524
- Tamiya: PS-54 Cobalt Green polycarbonate spray, item 86054
- TamiyaClub: Porsche 934 (1976) 50th Anniversary kit listing
- TamiyaBase: 47524 specifications and paint references
- RC Driver: How to paint a polycarbonate body (Tamiya)
- LiveRC: Flashback Friday, Tamiya's first R/C car


